
Not only do I love to travel, but I love crafts. What’s better than crafts? Travel themed crafts!
This was a quick project that I did to personalize my apartment. I found a couple extra maps of Europe laying around (apparently you can get them free as a AAA member!) and decided to make some coasters highlighting some of my favorite cities I’ve visited in Europe.
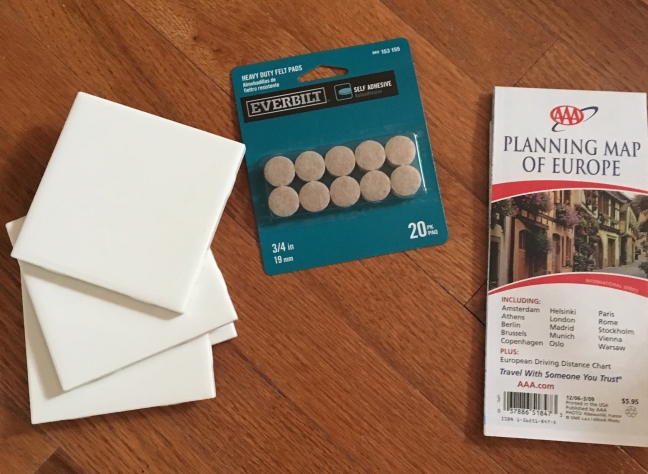
Supplies:
- Blank white tile coasters
- A paper map
- Modge podge
- Sponge brush
- Scissors
- Pencil
- Spray acrylic coating
- Felt pads
This project was a cheap one for me as I already had the paper maps, modge podge, brush, and scissors.
The tiles cost $0.16 a piece at Home Depot, the felt pads cost $2.67 for a 20 pack (I bought 2×20 packs), and the acrylic coating cost $3.59 ($5.99 with 40% off coupon) at Hobby Lobby. This gave me a grand total of $10 and some change to make 8 coasters.
Now who’s excited to get started?
- Gather your supplies
- Cut your map
- Glue your map to your tiles
- Spray your map with acrylic coating
- Attach felt pads to bottom of tiles
So simple, even those DIY-challenged can do it!
- Gather your supplies.
- This project can be broken down into different days, but the first part of the project you’ll rely on your paper maps, tiles, scissors, pencil, modge podge and sponge brush.
- The second part of the project you’ll need the acrylic coating spray and felt pads
- Cut your map
- Before cutting, you’ll want to pick out the pieces of the map that you want to incorporate onto your tiles. I chose to find major cities that I have enjoyed visiting and once I narrowed this down to 8, I was able to place the tile on top of the map and trace the shape of the tile onto the map. Now this will be larger than your tile, but it gives you a rough estimate.
- After you have your square stencil, cut out your squares and trim as necessary to fit your tile.


- Glue your map to your tiles
- Using your sponge brush, take your modge podge and glue your square piece of map onto your tile. You can choose to dip your brush into the modge podge, or pour the modge podge onto the brush or tile. It all works!
- After gluing the map onto the tile, I also used modge podge and swiped my brush a couple of times over the top of the map to make sure it really seals.
- You’ll want to let the tile dry and complete the modge podge on top process 4-5 times. I repeated the process about twice a day for two days after I started the project-once in the morning and once in the evening.


- Spray your map with acrylic coating
- Once your map is dry and you are done adding layers of modge podge, take the coaster outside to spray with acrylic coating. You’ll want to hold the can about two feet away and spray evenly across. This should dry pretty quickly.
- I applied two coats just for good measure!

- Attach felt pads to bottom of tiles
- The last thing you need to do, is flip your coasters over and attach the felt pads to the corners. The felt pads have adhesive attached, so you’ll remove the sticker and place them where you want them.
- I chose a felt pad in each corner to keep it balanced!

I absolutely love the way these tiles turned out! Part of me wants to use them constantly, and part of me wants to never use them so they don’t get ruined!

Other adaptations of this project could include making your coasters out of printed photos, travel brochures, magazines, book pages, fabric, or even mini collages out of whatever you want! Modge podge is an amazing craft supply, and whatever you think you want to do, you probably could!
This would also make a cute gift for a friend or significant other if you utilized places you’ve traveled to together or places on your bucket list (or even photos of you two)!
I would love to see your finished projects! How was the tutorial? Easy peasy? How did your project come out? Do you LOVE it?! Let me know in the comments below!
