
One of the first posts that I wrote on this blog was about a smash book and how to fill it. However, I never followed up on that! So what is a travel smash book? According to the Urban Dictionary, a smash book is a cross between a scrapbook and a journal. Any memories you have can be glued, taped, tied, stapled, whatever-in this epic spiral bound book. I had all these plane, train and bus tickets, entrance tickets, brochures, postcards, and handouts from my trips stored in a box, wanting to preserve them, but had no idea how. I’ve scrapbooked before, but it takes up so much time and I always wanted my pages to look absolutely perfect. So I stumbled across a smash book on Pinterest. I loved how creative some people are, even including coins, drawings, and wrappers, and thought that I could do that too, without the pressure of making it all look perfect. So I gathered some supplies and got to crafting!
Click for more information on How to Fill Your Travel Smash Book.
To create your smash book you should:
- Gather your supplies
- Organize your pages
- Smash it all together
- Enjoy!

- Gather your supplies.
I tend to do a lot of DIY and crafts, therefore had lots of supplies on hand. However, lots of different craft stores have a variety of things which will need your collaging needs. The more you play around with your book, the more you’ll realize how much you love a specific supply, and don’t really like another. For example I thought I would love the fun shaped scissors and not really like washi tape. Instead, I no longer bother with the fun shaped scissors and I continue to buy tons of washi tape!
Some crafting supplies which I utilize are as follows:
- Scrapbook paper
- Gluesticks
- Travel stickers
- Letter stickers
- Shape cut-outs
- Washi tape
- Stamps
- Ribbon
- Craft labels
- Sharpies


I do not know what your crafting space looks like, but mine was clearly the floor. I spread everything out (in an organized fashion of course) and would sit in the middle of my supplies. I had a system where my scissors and gluestick were always on my right side, along with the travel and letter stickers. On my left side was my stamps, paper, sharpies, and memorabilia.
Once you have everything laid out, be sure to grab your travel memorabilia.
2. Organize your pages.
I have started to get into the habit of carrying a small and a large ziplock bag with me when I travel. This way, during the day, I can place tickets and other items into the small ziplock in my purse so that they don’t get lost or ruined. Every night before bed, I empty my purse and ziplock and place it in my larger ziplock. By the end of each trip, I have a large ziplock filled with tons of memorabilia. I bring everything, and I mean everything home with me.
On my last trip before I started making a smash book, the last night out of the country, I threw away all my maps, receipts, and brochures for everything I had done (over a month and five different countries) only keeping the tickets. Once I started my smash book, I was devastated that I threw all that good material away! Now I save it all, and let everyone make fun of my travel hoarding because you never know what will inspire you or make a great addition to your pages.
So, I have a huge collection of nonsense that I want to journal. It is up to you how you want to complete your journal. I complete mine in a linear fashion. I start by organizing all the materials together based on country (if it’s a multi-country trip). From those piles, I organize the materials into specific days. If you forget what date something is, lots of tickets and receipts have dates printed on them! Then, I bag up everything by day, except day one, and put it away.
Once I have day one in front of me, I lay out all the memorabilia and take a good luck at everything. What items are useless or really have no aesthetic value? Those can then get thrown in a pile, to get thrown away. (I don’t throw it away yet, cause sometimes I change my mind, or need to fill a blank space, or what-have-you). Then I start to piece together how I want my page, or pages to look.

When I first started my smash book, I would use one page to represent each day. Now that I have started to figure out what I like to include, I use as many pages as I need to showcase and represent my day. Sometimes I have just one page, other times I have had like six pages.
It’s your book, do what you want!
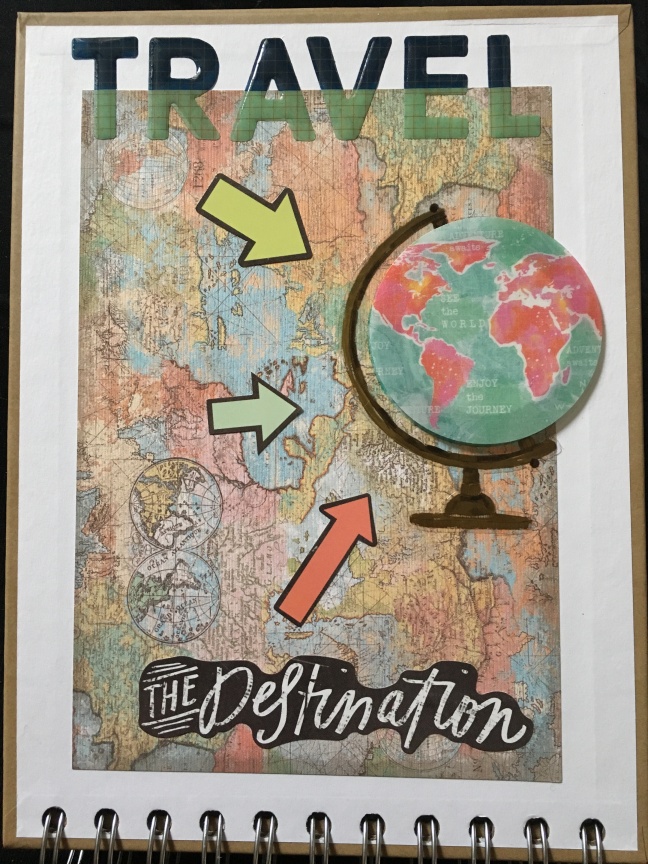
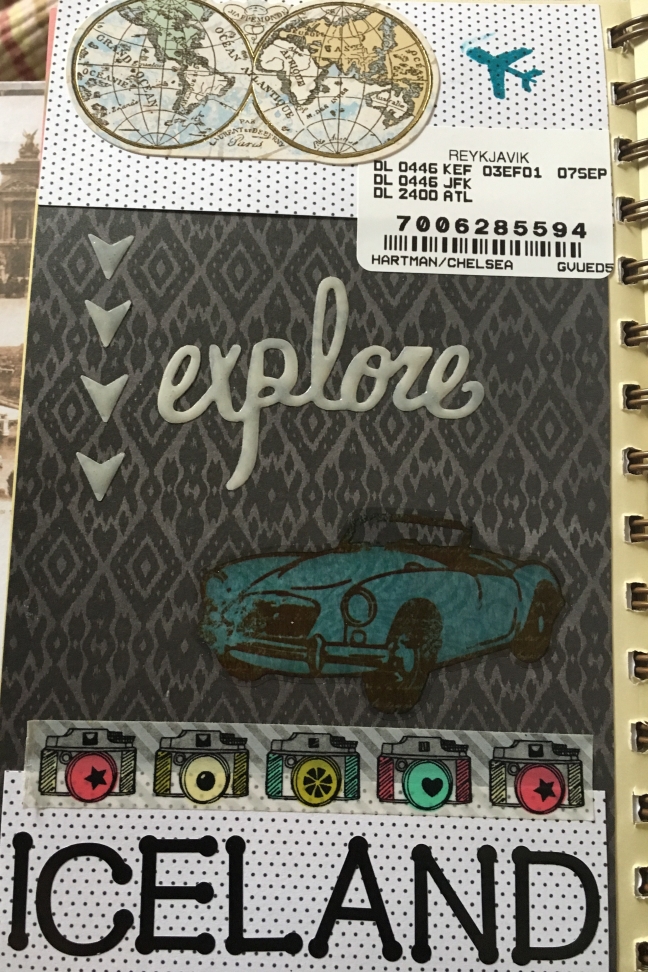
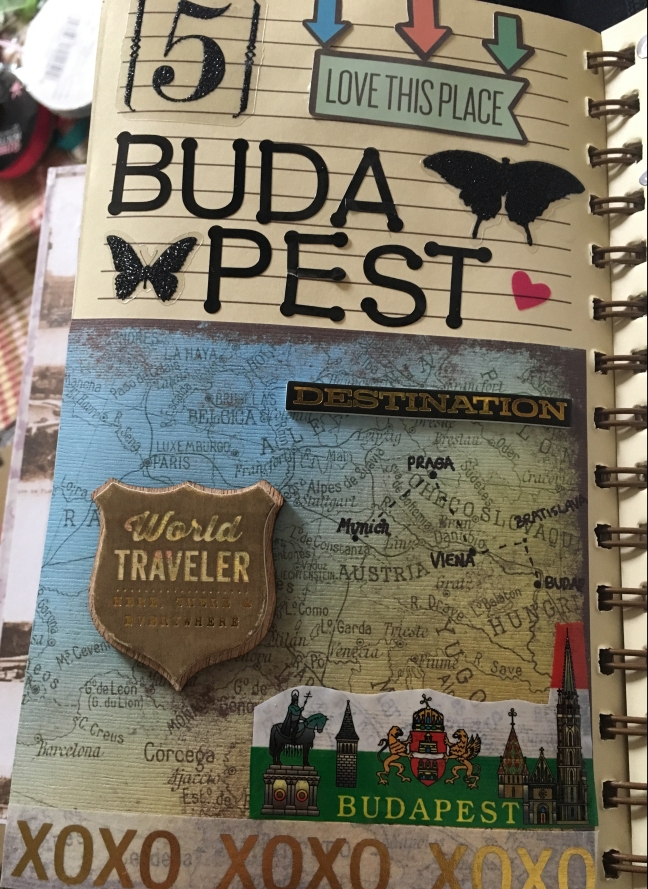
I like to start with a cover page for the country or city that I am going to. Sometimes I use a map of that place, and then utilize my letter stickers to spell it out, and add some cute stickers. Washi tape is a great way to throw some color and contrast into blank space, or tie together two separate paper designs.
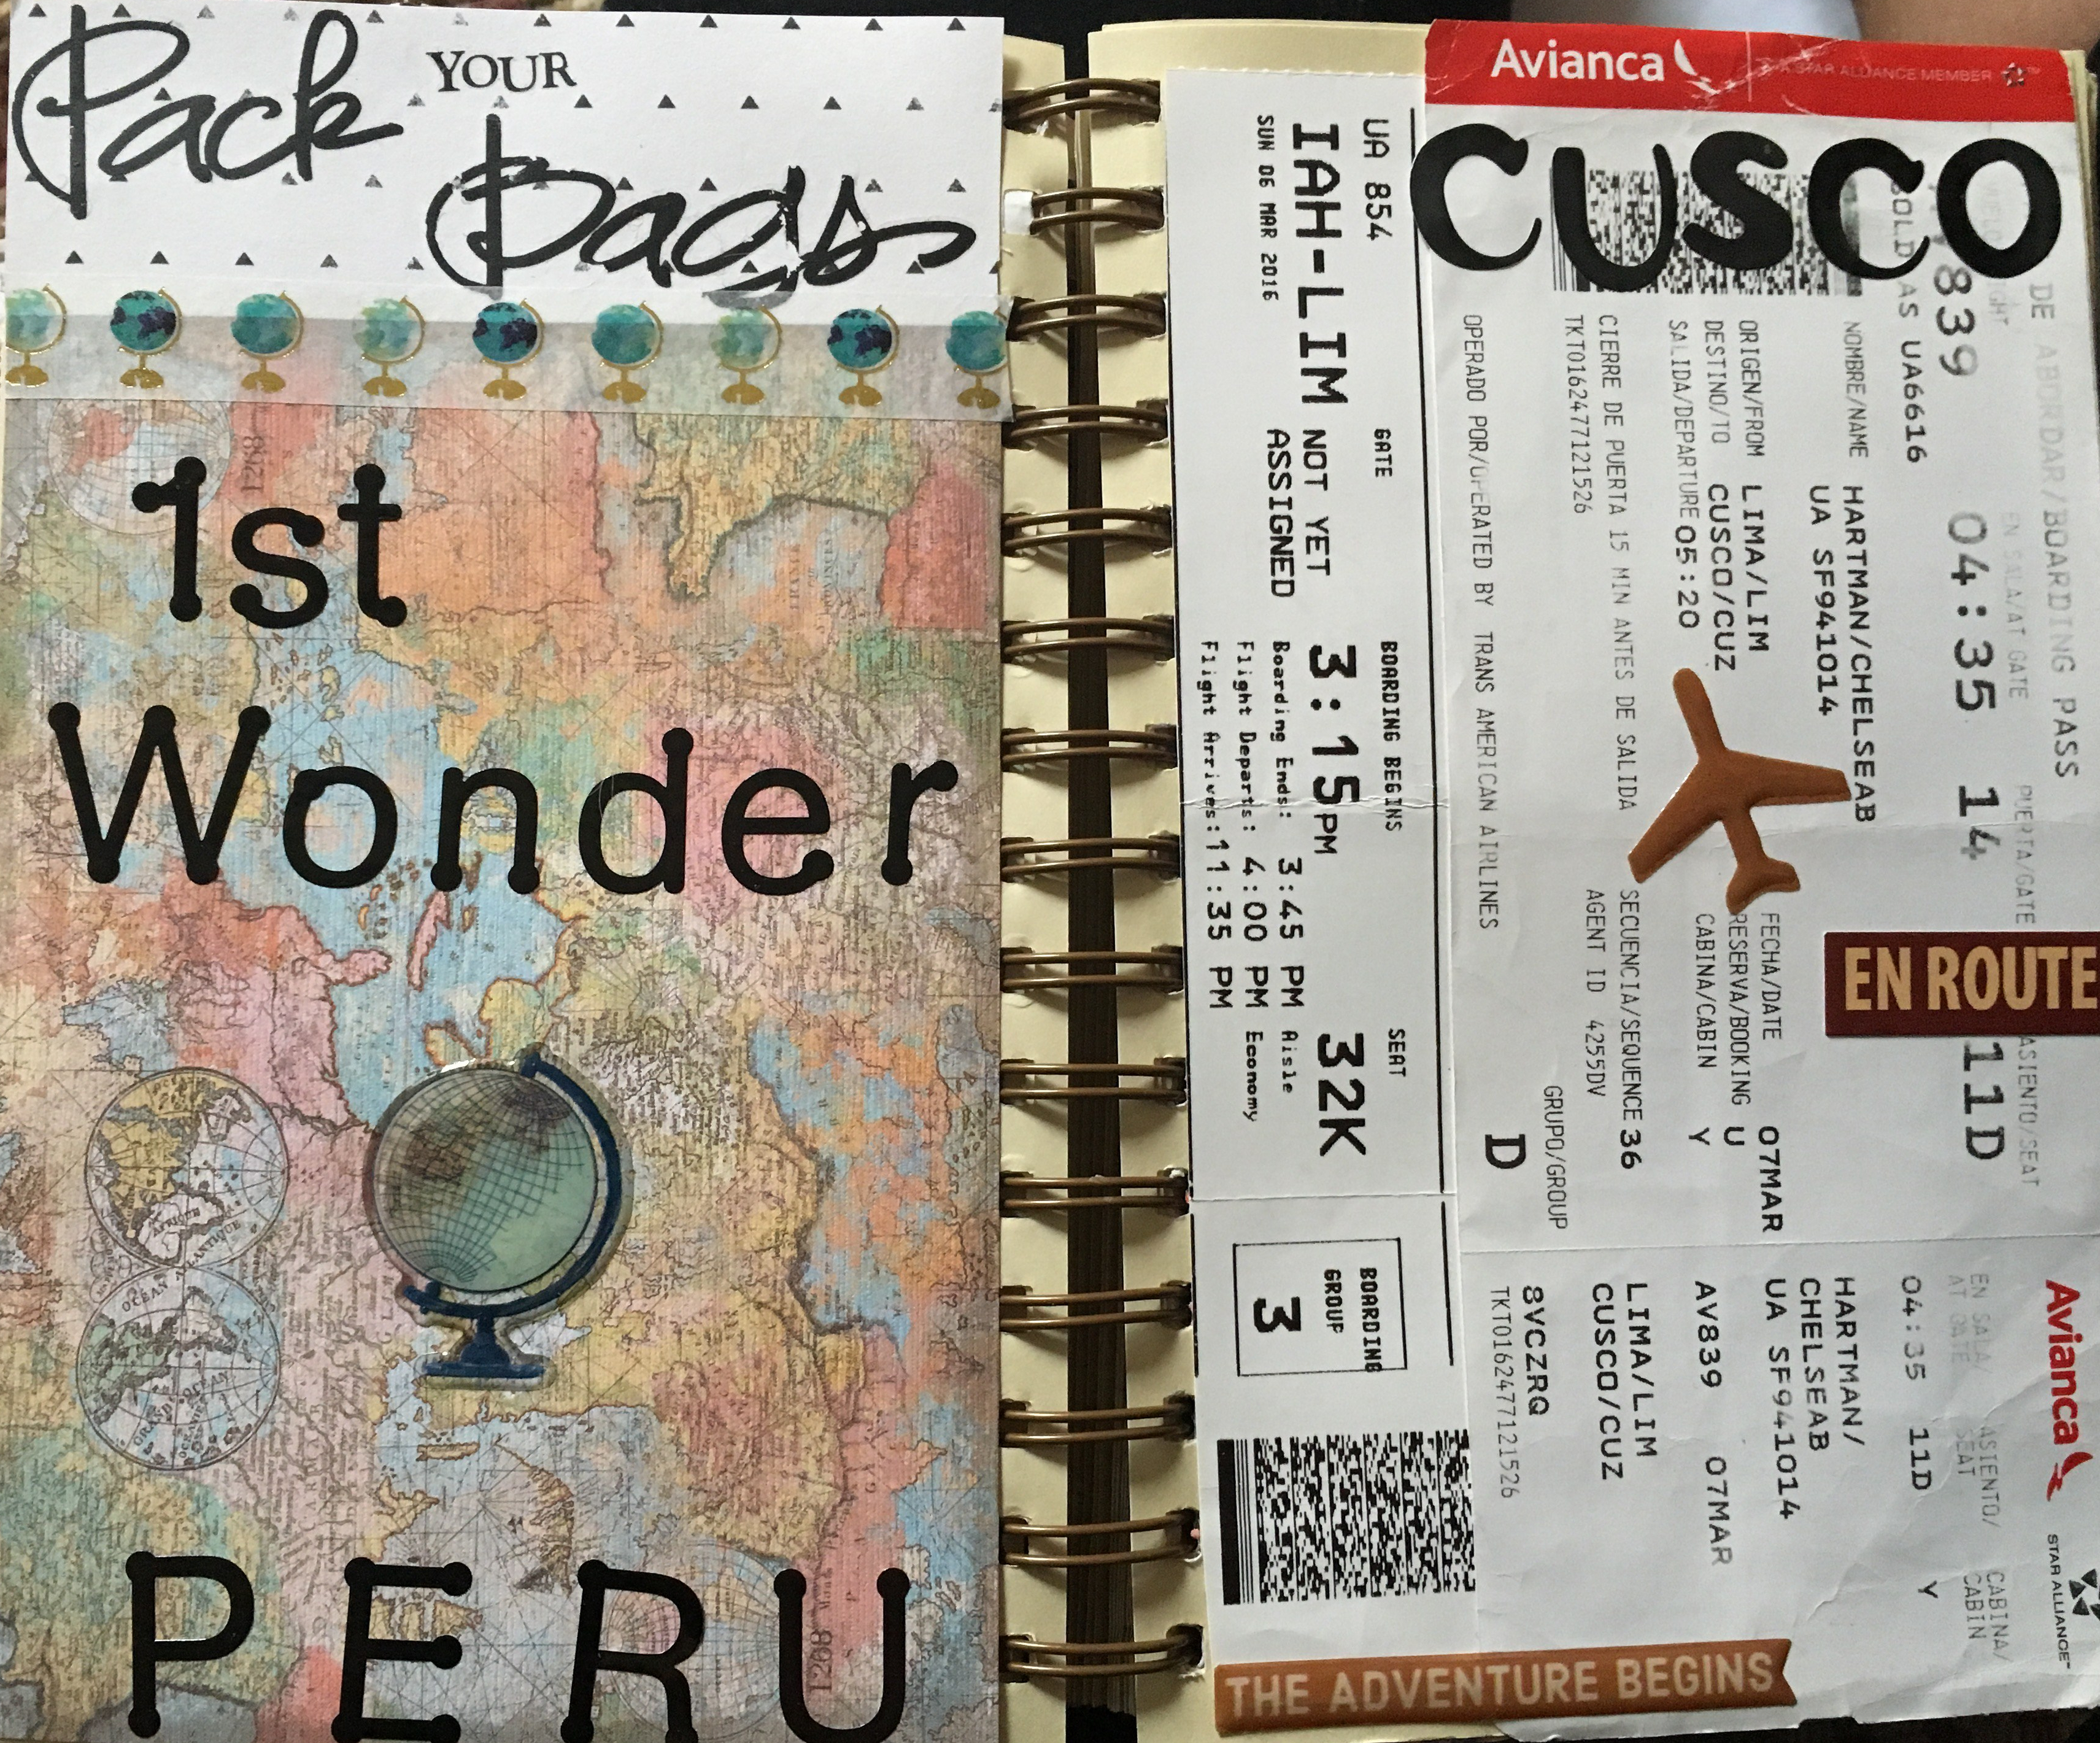
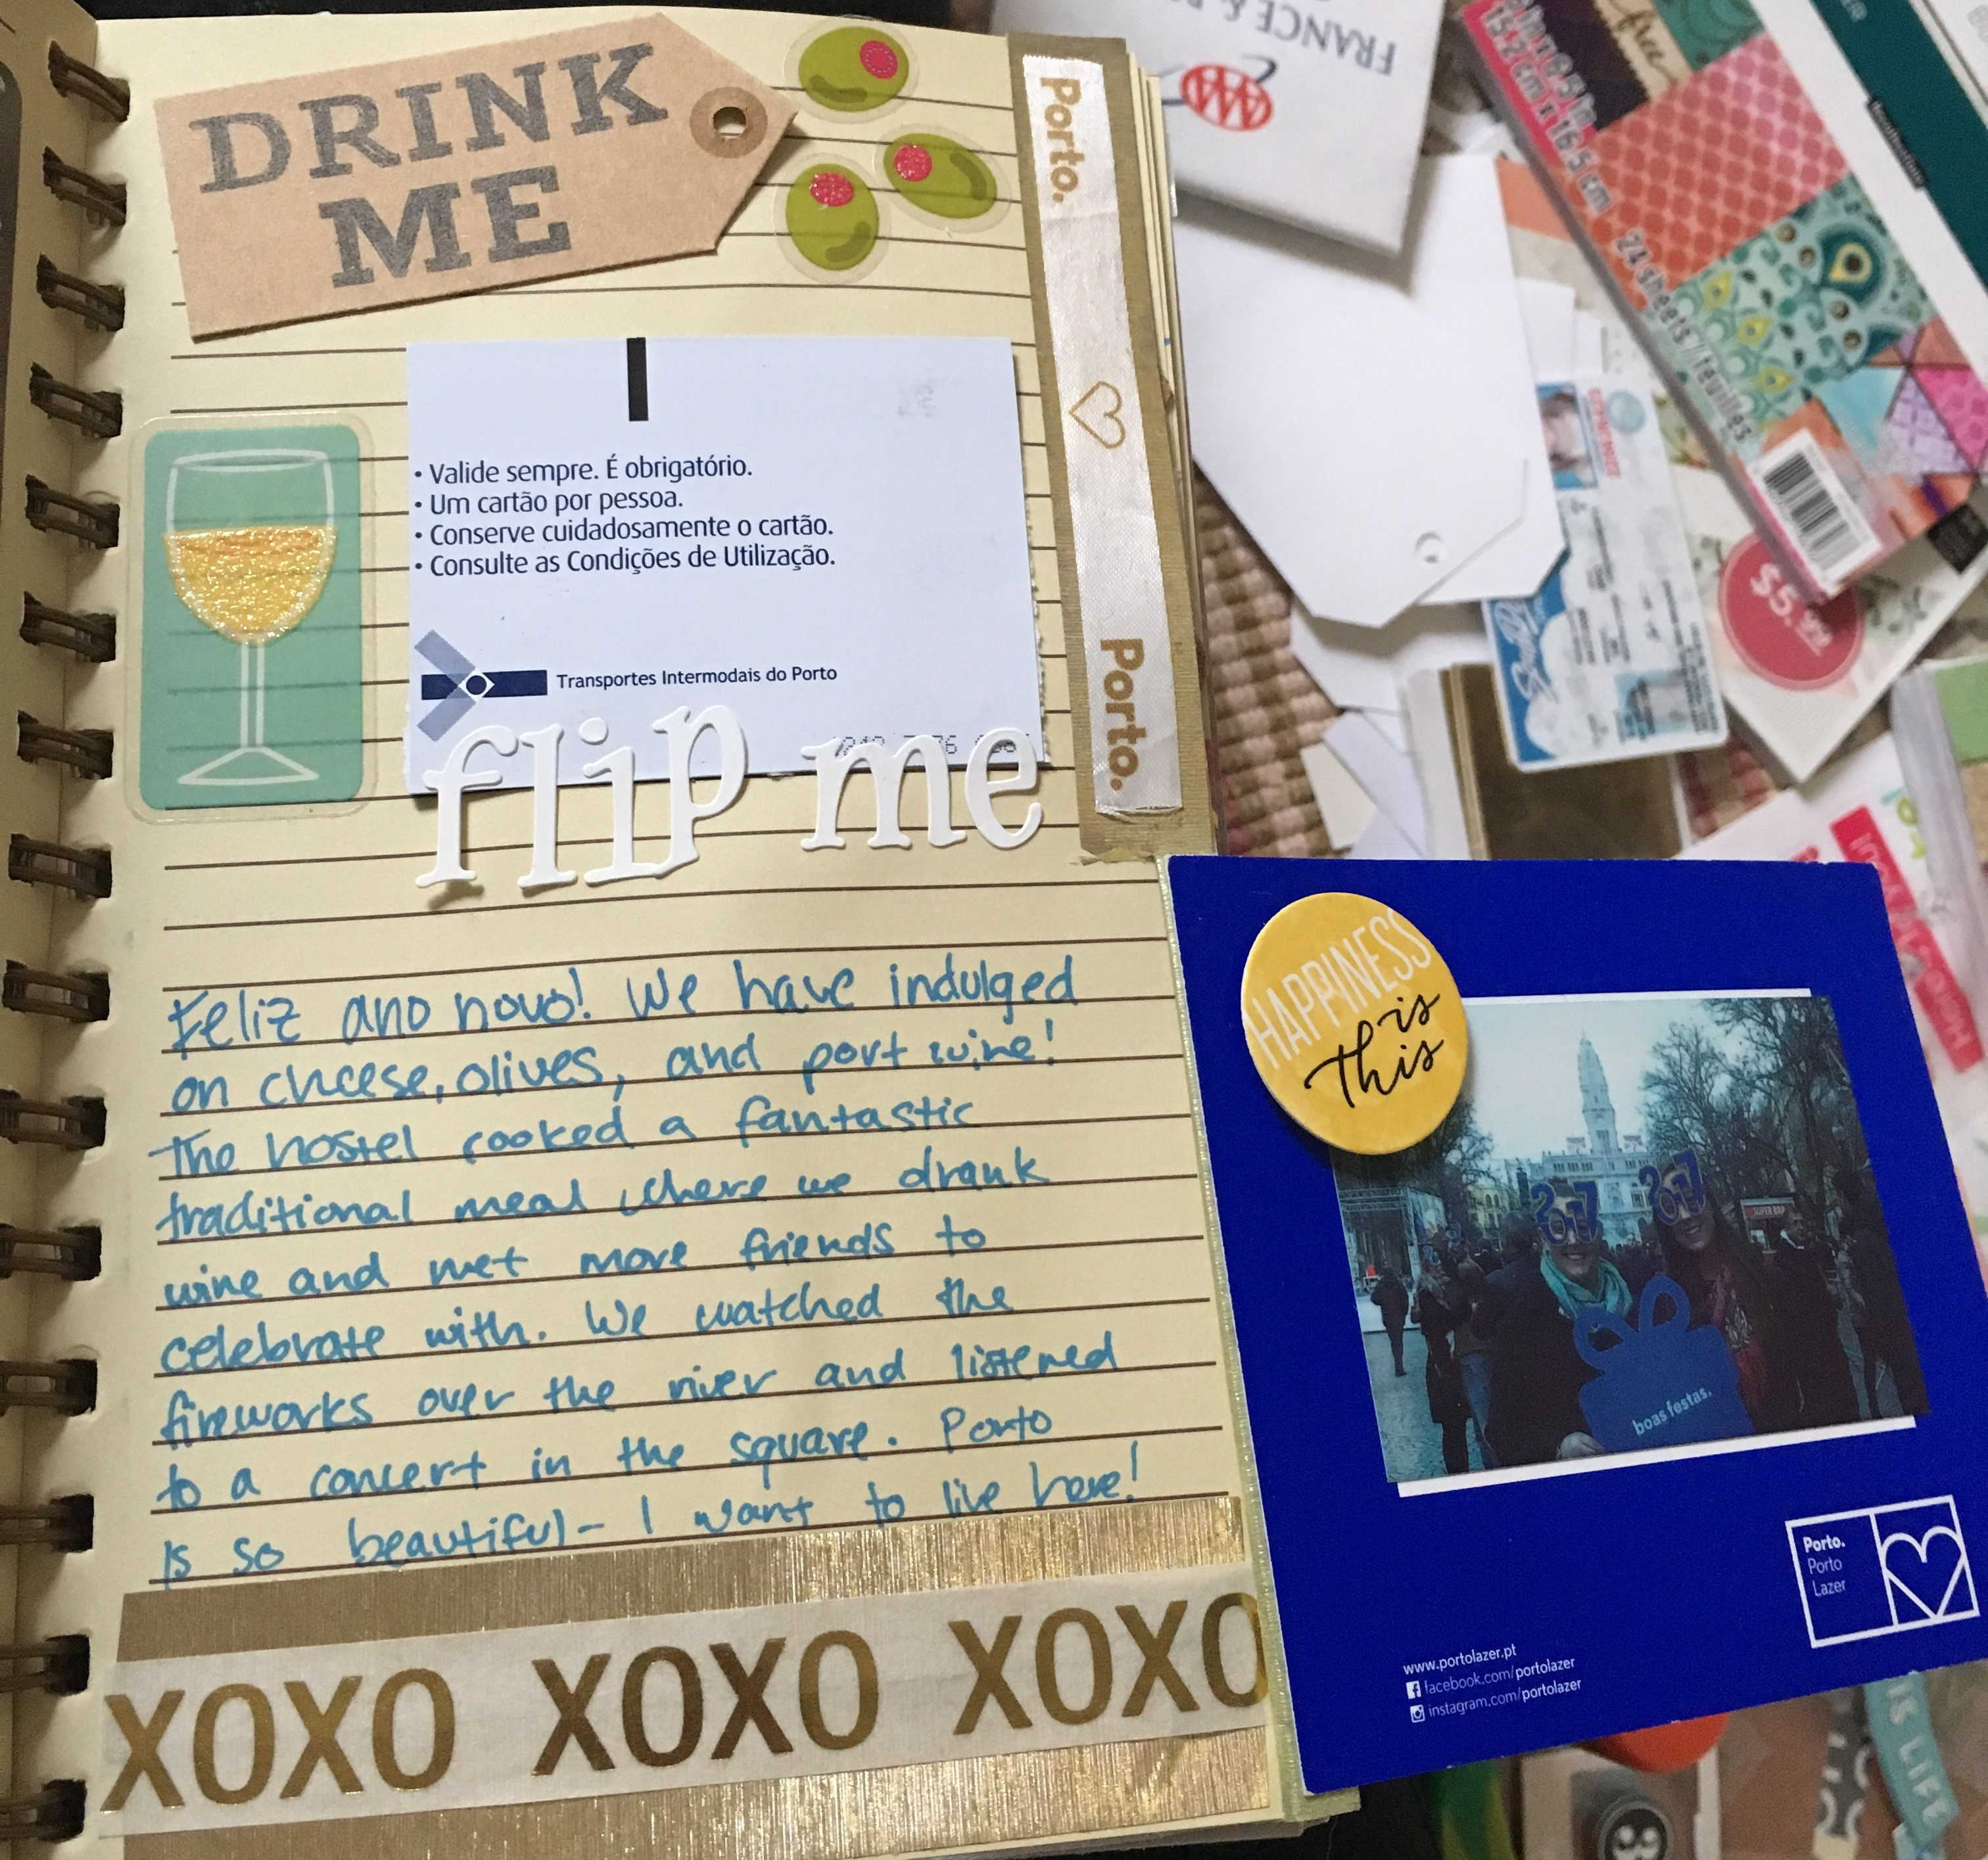
Once I have my cover page set, I typically paste my plane tickets on and add some fun travel stickers and washi tape to those. Some pages are literally just plane tickets, other pages, I cut up the tickets and add extra fun things to it. It’s whatever I feel like at the time. It’s ok to be creative and cut things out, while adding other things.
3. Smash it all together
Once I have my cover page and airplane ticket down, I get to play around with all my other tickets and memorabilia. This is so fun to me! I love utilizing brochures as the background paper with the ticket on top, or cutting out maps and drawing out the route of my travels.

It’s also fun to include actual pictures from the trip, and of course journal about your experience! I tend to journal randomly. Sometimes I make a bullet list for what I saw that day, or food I ate. Other times I utilize half a page to describe a specific attraction or my day.

Some fun ways to make your pages look fancy is to utilize a background paper, whether it’s scrapbook paper or something you cut out from a brochure or postcard. Next I like to place a plain or fun designed paper underneath my ticket or receipt to make it stand out. Sometimes I choose to line the notebook with washi tape, or a fun sticker. Following this, I add my pictures and stickers. Sometimes I use a color theme based on the colors of the tickets and play off that with my stickers and sharpies, other times, it’s completely random.


Just like I start my with a cover page, I tend to end it with the return ticket home.

4. Enjoy!
I thoroughly enjoy the process of putting together my journal. I think it’s a fun way to remember your trip, and details come back to you as you look at the different items you have tucked away. It’s also fun to show it off and say “Wow, I really have experienced some amazing things!” I am obsessed with my smash books as I have caught up to all my wild adventures!
Don’t forget to check out How to Fill Your Travel Smash Book!
Happy smashing!
So I’m curious, do you keep a memorabilia journal? Do you scrapbook or journal? Let me know, in the comments below!
